Bitmoji Classroom
Bitmoji Classrooms are really catching on as teachers try to have fun and increase engagement by designing their virtual environments. In the simplest form, a Bitmoji classroom is just a Google Slide with hyperlinked images and objects that link out to class information and resources. Check out the Pinterest collection at the bottom of this page to see some of the creative ways teachers are using their Bitmoji Classrooms.
I‘ve outlined the simplest way to get started making your own Bitmoji Classroom. My “classroom” is more of a digital office with a focus on professional development, but the process is the same.
How to Make a Bitmoji Classroom
Prepare Your Bitmoji
If you don’t already have a Bitmoji, you’ll need to make one using their mobile app. Once you’re satisfied with your digital likeness, you’ll want to install the Bitmoji Chrome Extension. We’ll make our Bitmoji Classroom in Google Slides, so you’ll want to use the Google Chrome browser.
Create a New Presentation
Open a new Google Slides presentation and delete all text boxes to create a blank slide.
Add a Background
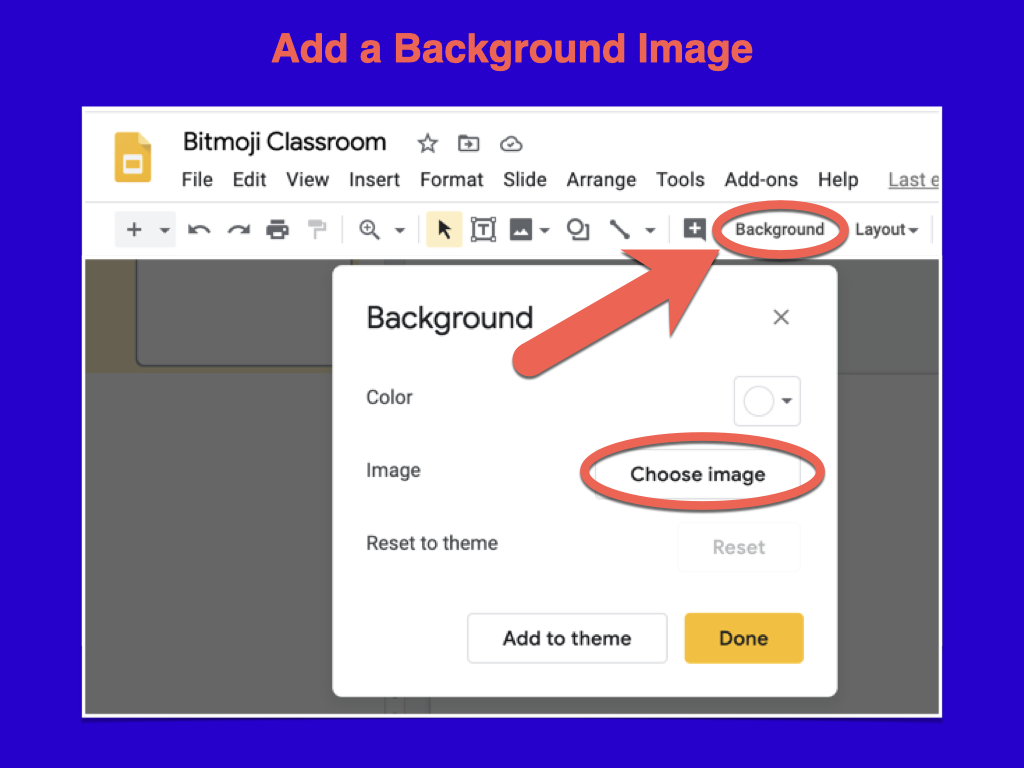
- Click BACKGROUND at the top of the screen.
- Click Choose IMAGE
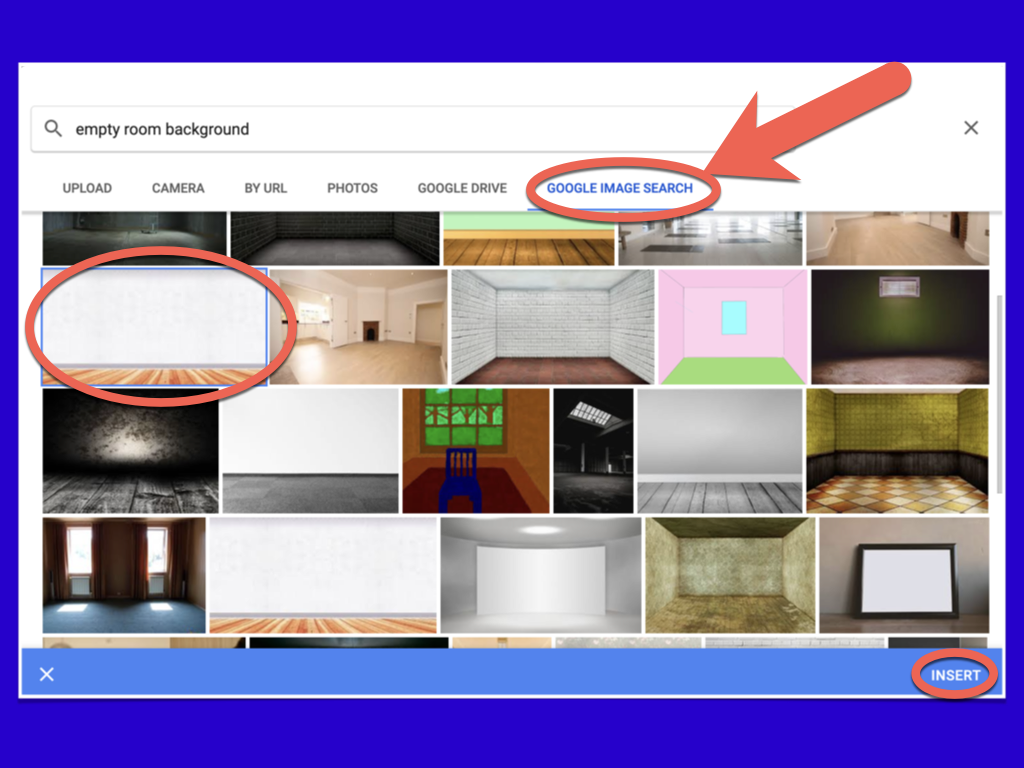
- Click IMAGE SEARCH
- Search for a room background. It’s easiest to work with images that consist of just a floor and a wall. Try search terms like “room background”, “floor and wall”, “empty room background.
- Select an image.
- Click INSERT.
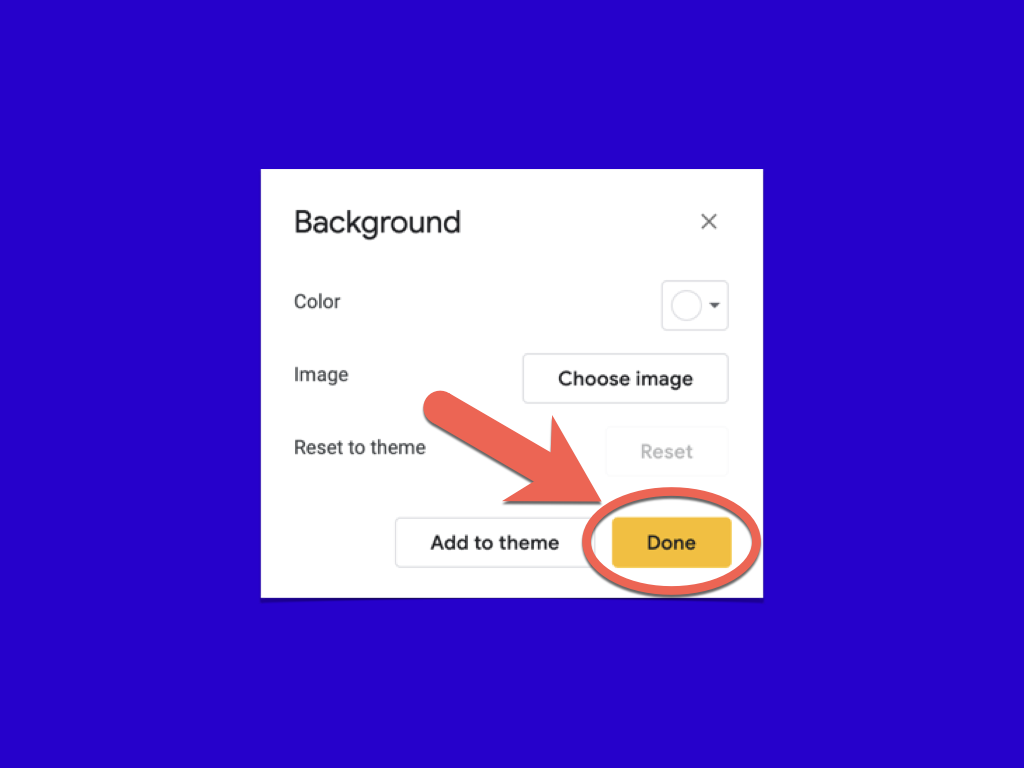
- Click DONE.
Note: You can also upload your own images (we’ll get to that later).
Add Wall Art and Furniture
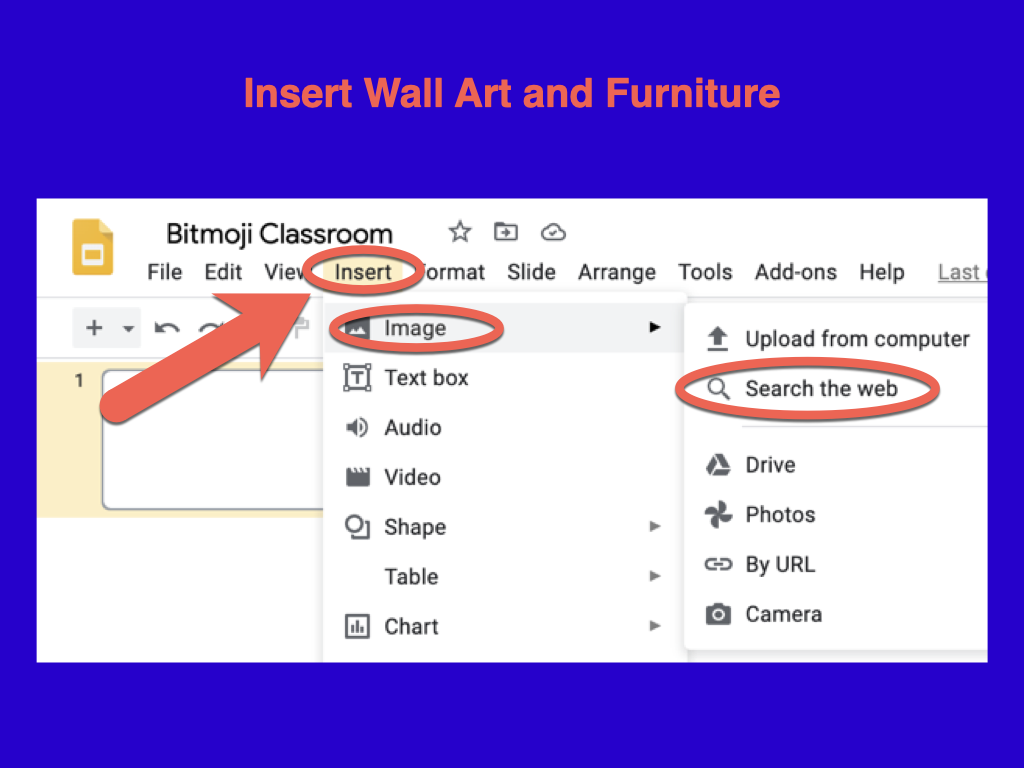
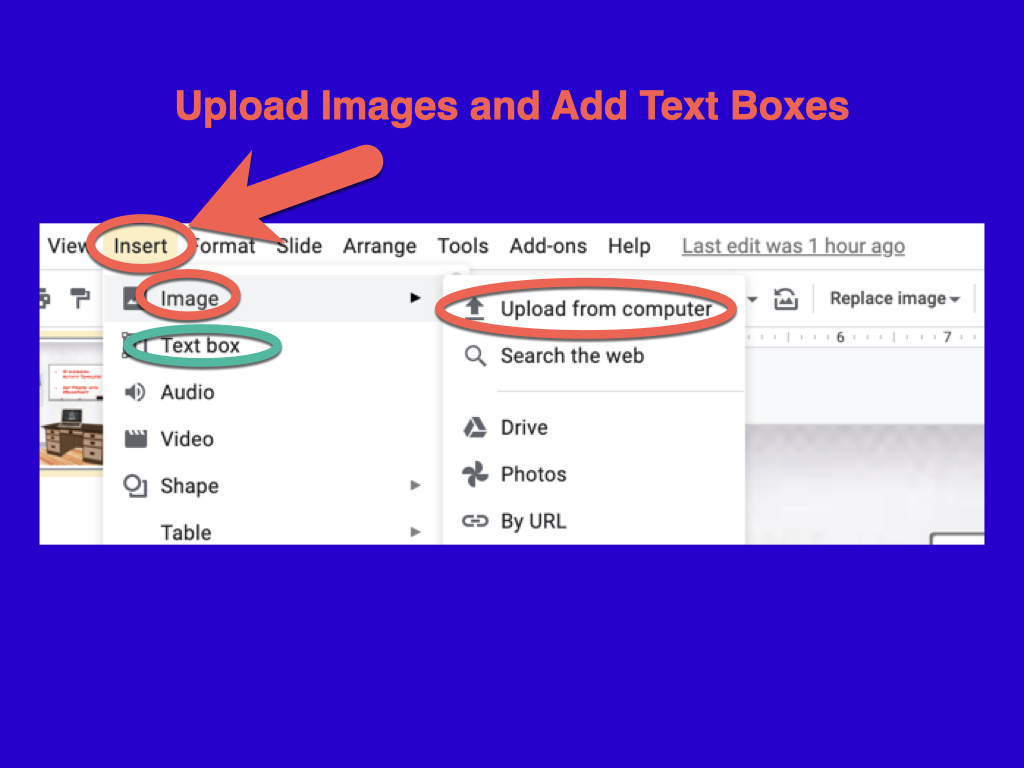
- Click INSERT
- Choose IMAGE
- Select SEARCH THE WEB
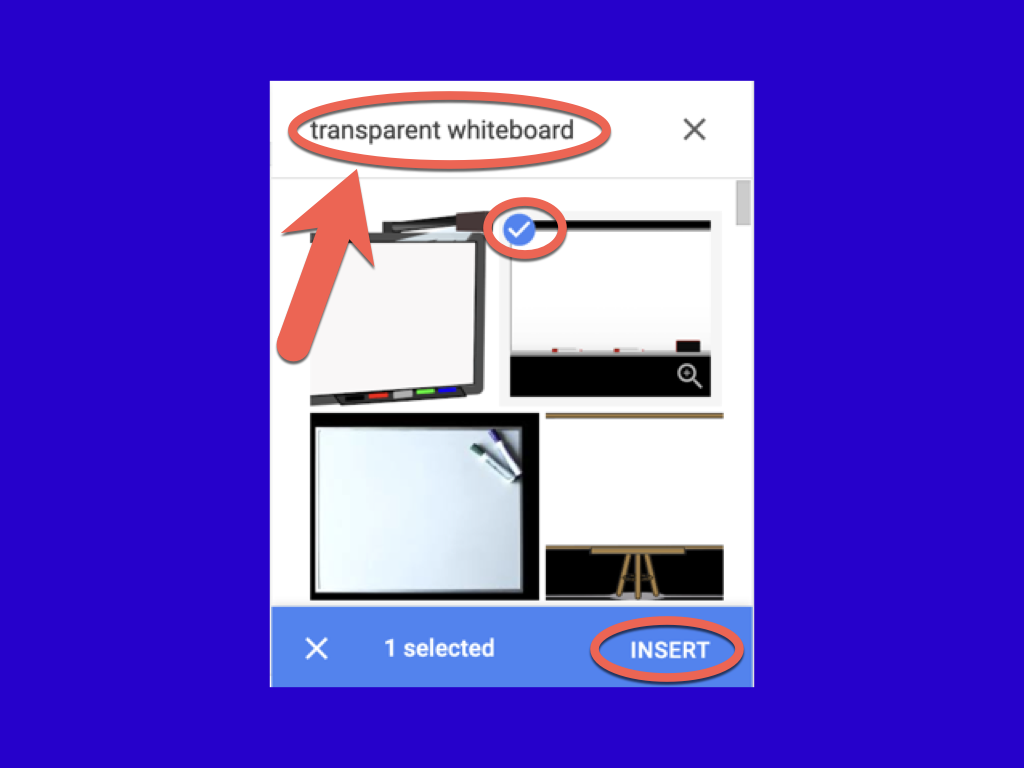
- Search for wall art and furniture. Make sure you search for images with transparent backgrounds. Try search terms like “transparent whiteboard”, “transparent couch”, “transparent bookshelf.”
- Select an image and click INSERT.
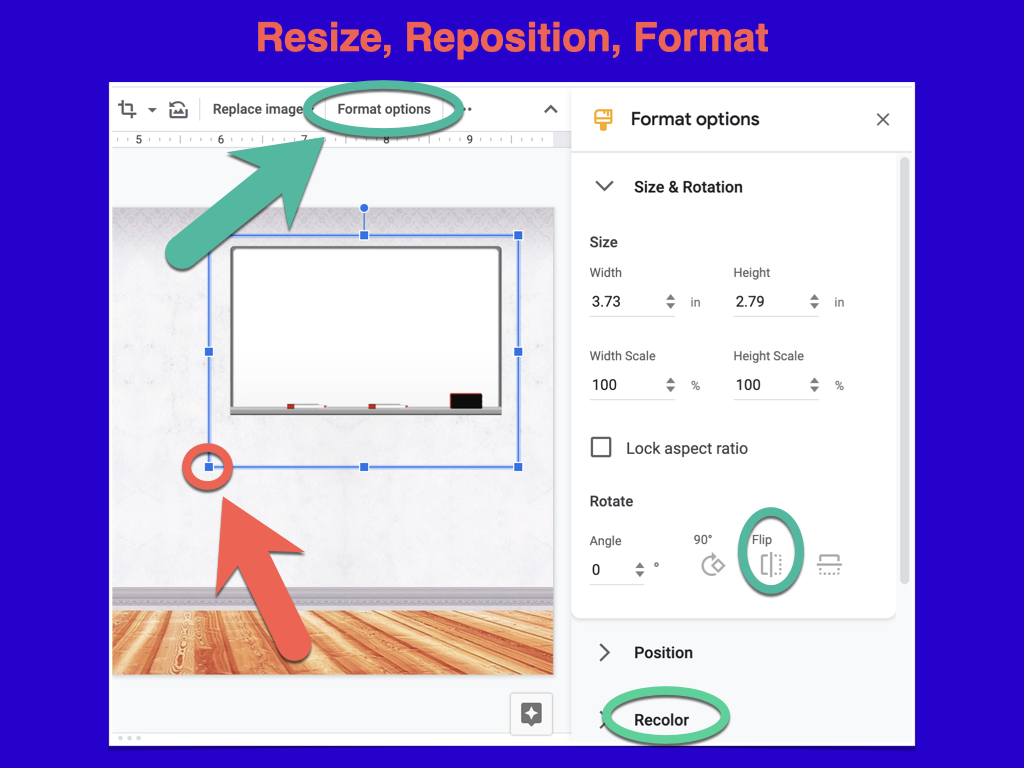
- Click and drag to resize and position your image.
- Optional Image Formatting:
- Click FORMAT OPTIONS. Use features like RECOLOR, ROTATE, or FLIP to change the appearance and orientation of your furniture and wall art.
- Double click an image to crop it.
- Repeat the steps above until you have decorated and furnished.
Note: You can use images you find elsewhere, but it’s easiest to work with transparent pictures. You may want to use a tool like Remove.bg to remove backgrounds from your pictures.
Add Objects
Add additional objects to your classroom. Select or make images that represent the content you will link to. I created my own book covers using Canva and DIYBookCovers.com to upload to my classroom.
- Follow the steps under “Add Wall Art and Furniture” above to add objects to your virtual classroom. Adde things like books, computers, etc.
- Click INSERT and select TEXT BOX to add writing to your classroom.
- Tip: I used “Permanent Marker” font for the text on my whiteboard.
Add Your Bitmoji
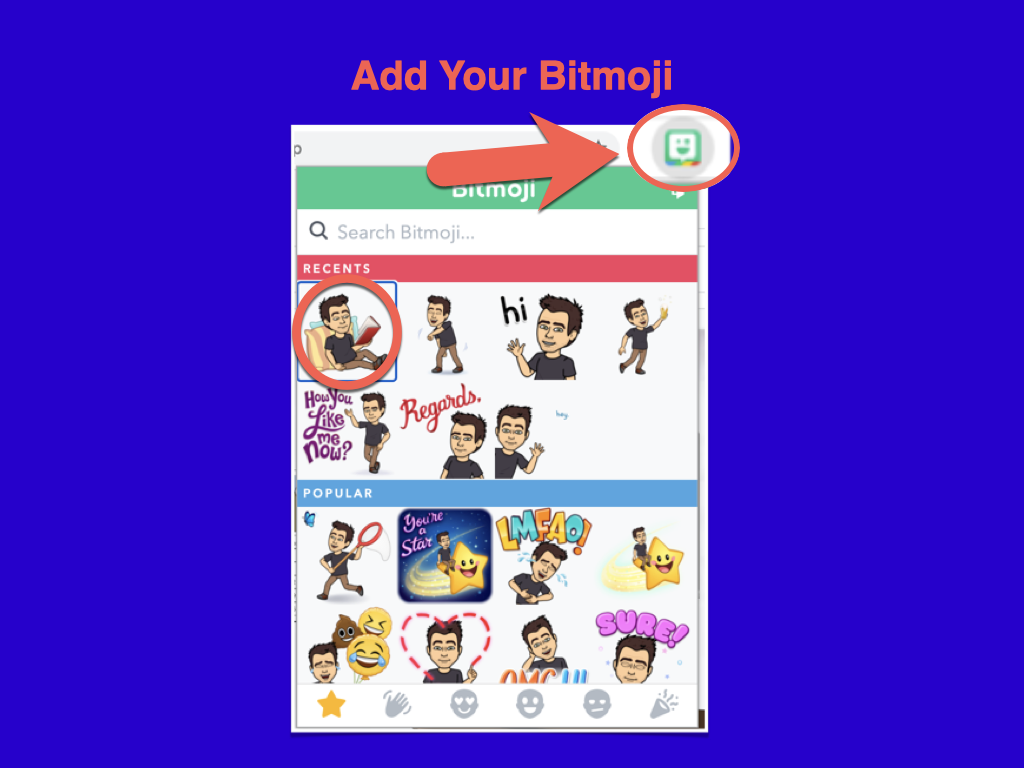
- Click on the Bitmoji Chrome Extension
- Find and copy (right-click > copy) the Bitmoji you wish to use.
- Paste your Bitmoji onto the Google slide.
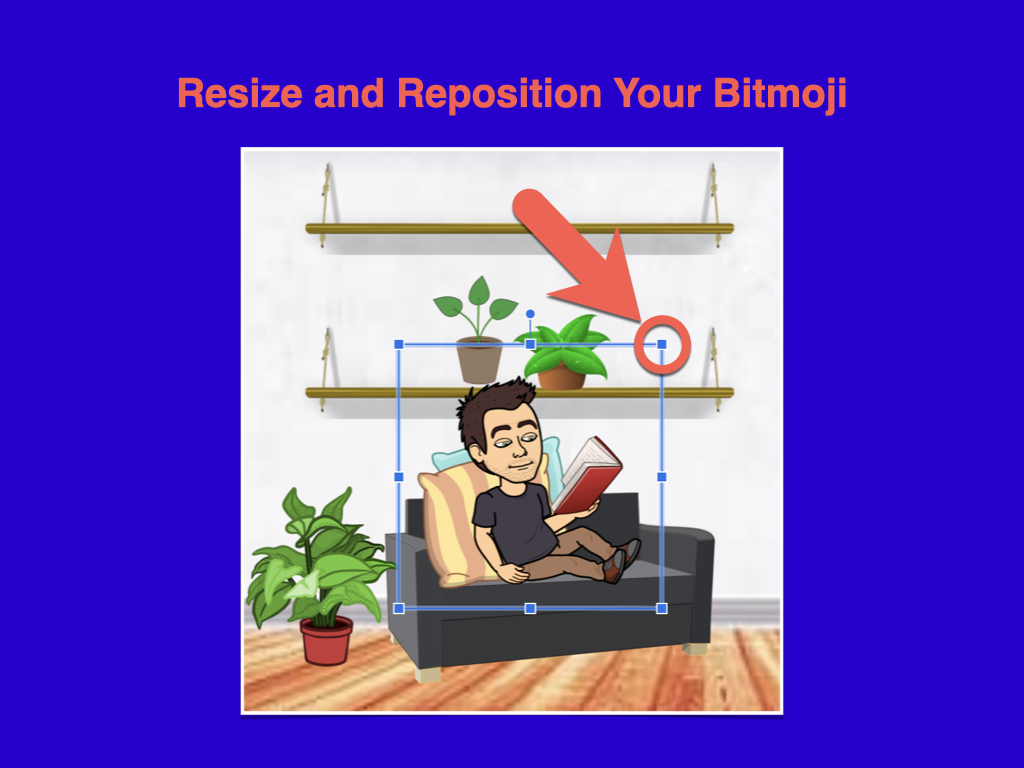
- Drag to resize and reposition your Bitmoji.
Hyperlink Your Images
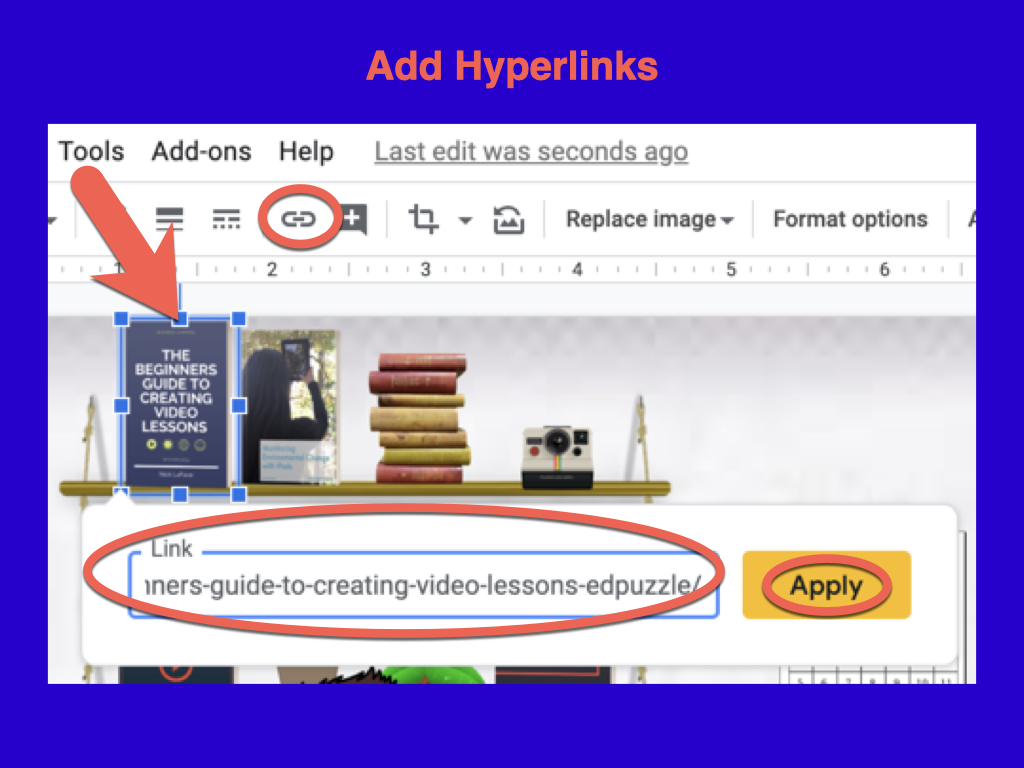
- Select an image or text boxes (not text) in your classroom.
- Click the hyperlink symbol at the top of the screen.
- Paste a link to the resource you wish to share.
- Click APPLY.
- Repeat the steps above to add additional hyperlinks.
Reminder: If sharing files from Google Drive, make sure your share settings are set so that students can access.
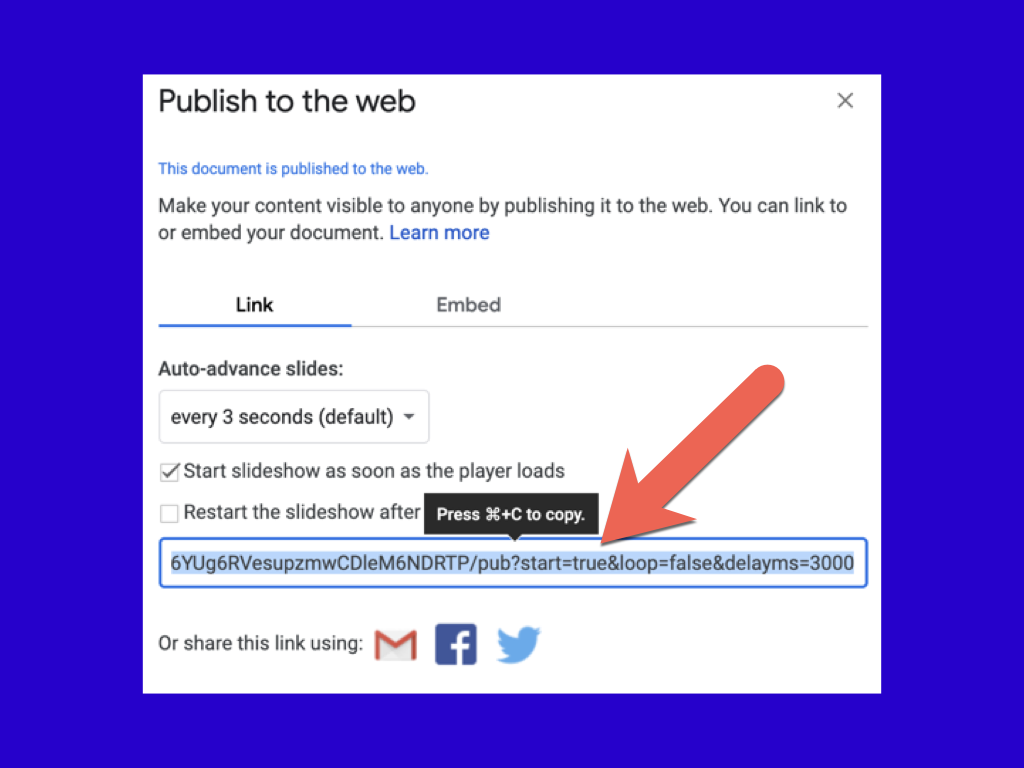
Publish and Share Your Virtual Classroom
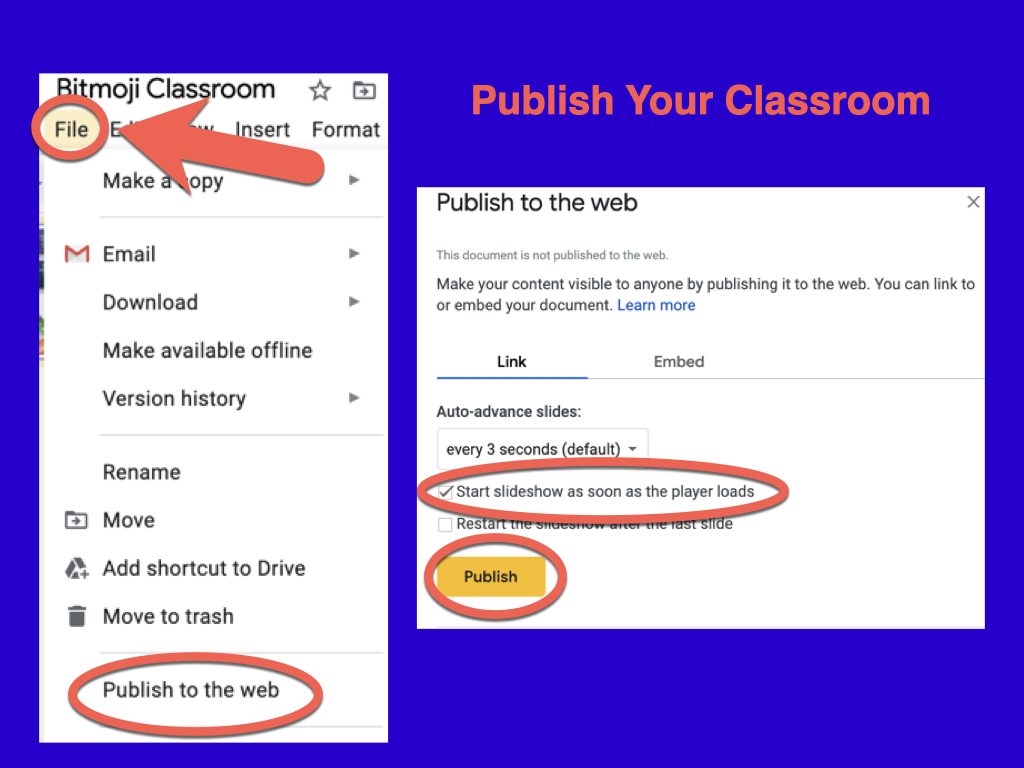
- Click FILE
- Select PUBLISH TO THE WEB
- Select “START SLIDE SHOW AS SOON AS THE PLAYER LOADS”
- Click PUBLISH
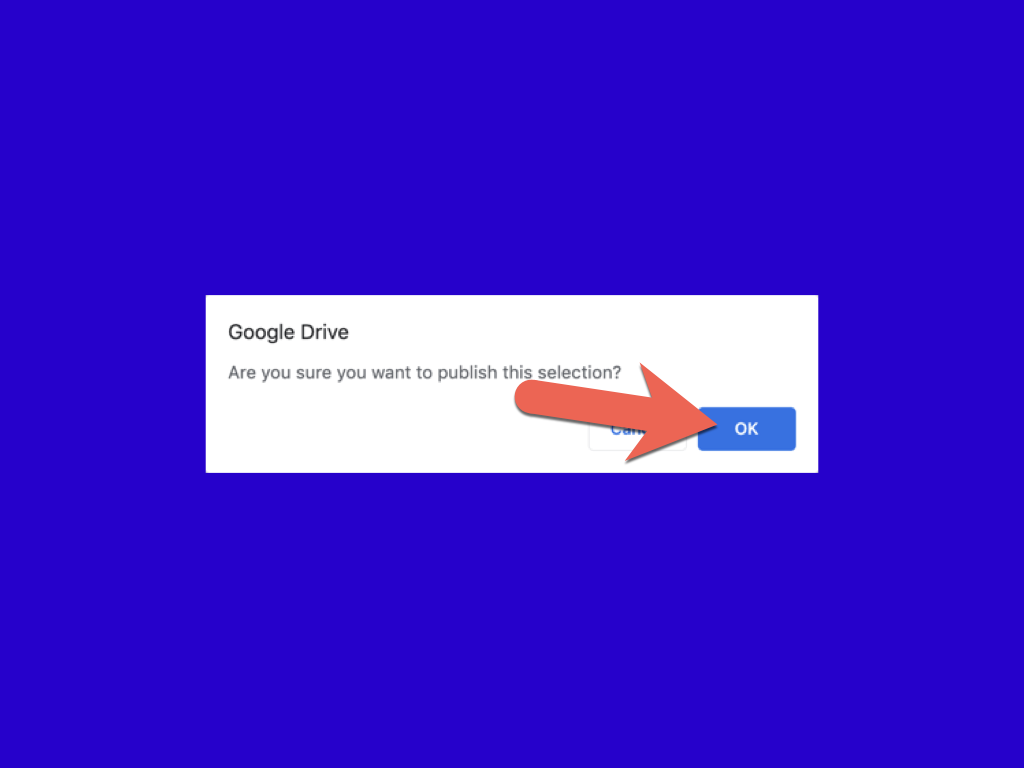
Click OK - Copy the link to your new Bitmoji Classroom.
Bitmoji Classroom Examples
What content will you share in your Bitmoji Classroom?
Share your ideas in the comments below or on Twitter.
Don't Miss a Pick - Follow Us


